![Trustero_Logo_RGB_1C.png]](https://support.trustero.com/hs-fs/hubfs/Trustero_Logo_RGB_1C.png?height=40&name=Trustero_Logo_RGB_1C.png)
Trustero includes a set of built-in user roles, such as Admin, User, Auditor, and Read Only. With custom user roles, admins can go further and decide exactly which features each group of people can see and use. A custom role starts from a built-in role, and you then turn individual features on or off to match how your team works.
This article walks through a common example: creating a Basic User role for team members who only need Policies, Controls, Risks, Vendors, Requests, Dashboards, and Trustero Intelligence.
Before you begin
- You must be an Admin to create and edit user roles.
- Changes to a role take effect for every user assigned to it.
Step 1: Open the User Roles tab
From the left navigation, open Users. The Users tab lists everyone in your account along with their current role.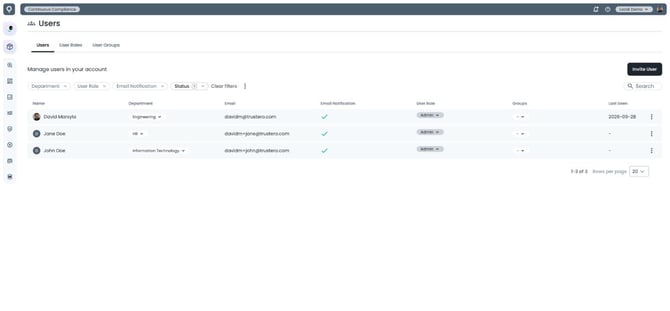
Select the User Roles tab. It lists every role in your account, whether it is Built-in or Custom, and how many users are assigned to each.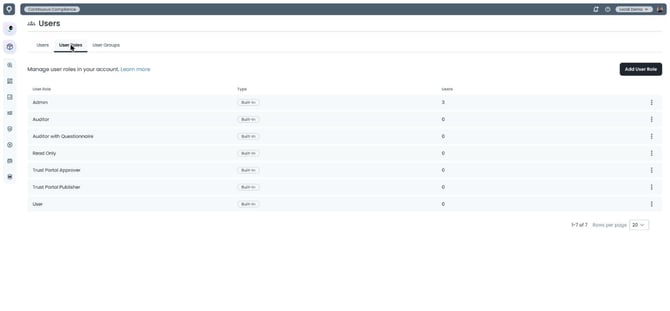
Step 2: Create the new role
Click Add User Role. Enter a Name for the role, such as Basic User. Under Inherit permissions from, choose the built-in role closest to what you want. For Basic User, choose User. Then click Add.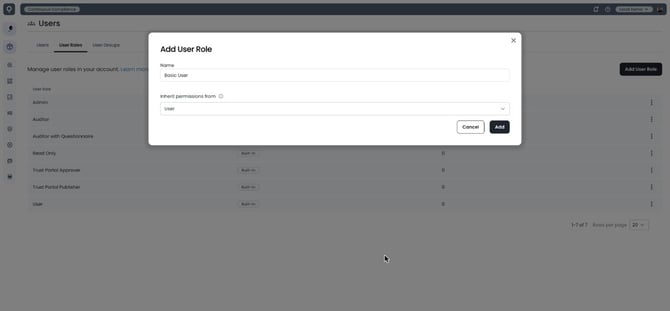
Hover the info icon next to Inherit permissions from for a reminder of how inheritance works. The new role starts with all the permissions of the role you pick. As Trustero adds new features, your custom role keeps receiving that role's defaults for them until you change a feature's setting yourself.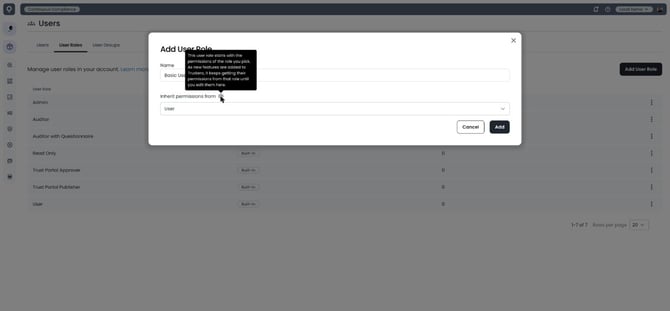
After you click Add, Trustero opens the role's detail page. Each row is a feature, showing the permission set the role currently has and any overrides you've made.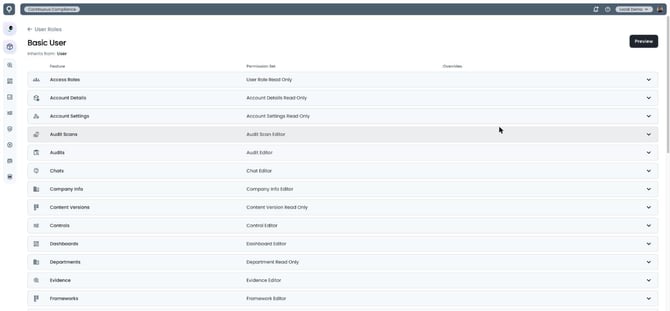
Step 3: Assign users to the role
Return to the Users tab. In the User Role column, click the current role for the person you want to change, then select Basic User. Custom roles appear alongside the built-in roles.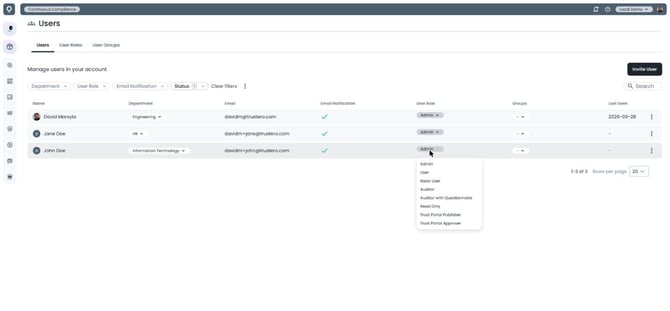
Click Change Role to confirm.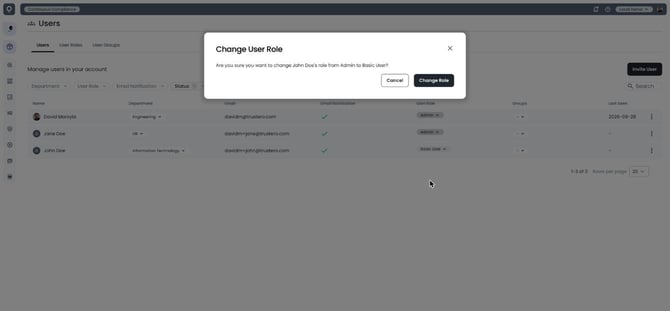
Repeat for each user. In this example, John Doe and Jane Doe are both now Basic Users.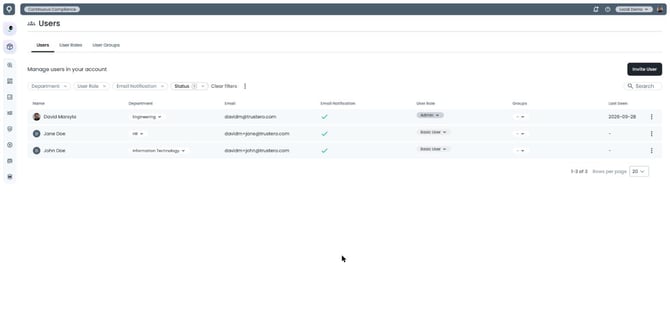
Back on the User Roles tab, Basic User is labeled Custom and shows 2 users.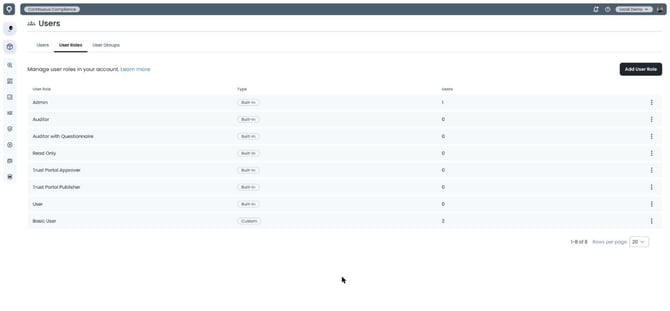
Step 4: Remove access to features the role doesn't need
Click Basic User to open it, then click a feature row to expand it. Open the Feature defaults dropdown and select No Access. The dropdown also lists the other permission sets available for that feature, such as Editor or Read Only. The one inherited from the base role is marked Default.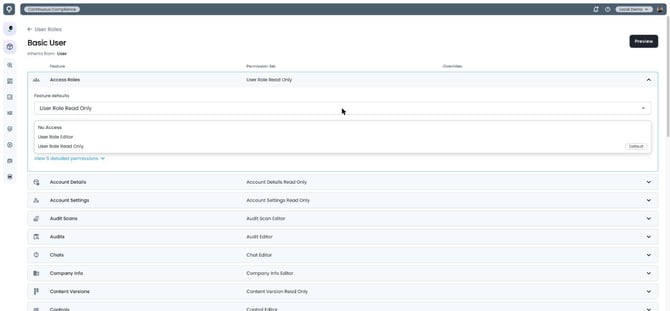
The change saves right away. The row now shows No Access with a Customized badge and an overrides count, so you can see at a glance what differs from the inherited role. Click Reset on a row at any time to return that feature to its default.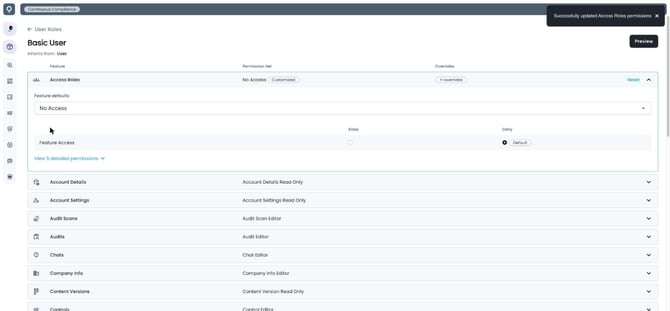
Repeat for each feature you want to remove. For Basic User, we kept Policies, Controls, Risks, Vendors, Requests, Dashboards, and Trustero Intelligence at their defaults, and set the other product features to No Access.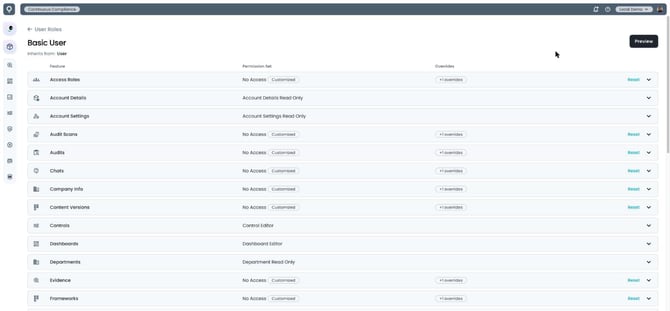
Tip: Leave the account-level features (Account Details, Account Settings, Departments, Notifications, Users, and Utilities) at their defaults. Users need these to sign in, receive notifications, and pick owners and departments inside the features they can access.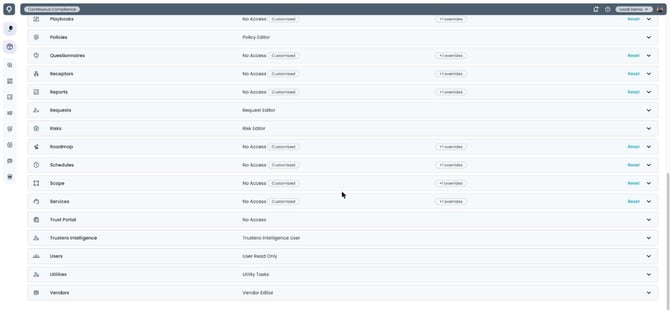
Step 5: Preview the role
Click Preview at the top right of the role page. Trustero opens a new tab showing the app as a member of this role would see it. You can also select user groups to preview their combined permissions.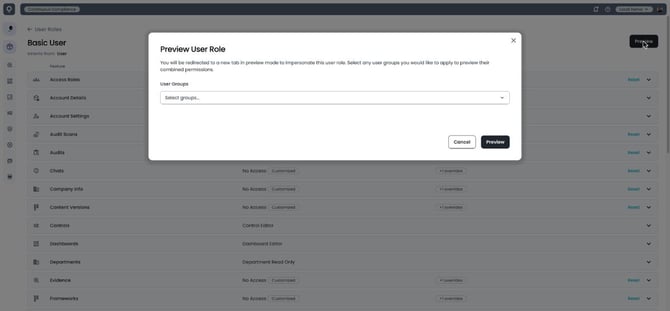
The preview shows only the features the role allows. For Basic User, that's Trustero Intelligence, Dashboards, Controls, Policies, Risk Register, and Vendor Management. A Preview Mode banner appears at the top of the page; click Exit Preview to return to your own view. John and Jane see the same navigation the next time they sign in.